Tuesday, September 27, 2011
September Daring Bakers Challenge - Croissants
The Daring Bakers go retro this month! Thanks to one of our very talented non-blogging members, Sarah, the Daring Bakers were challenged to make Croissants using a recipe from the Queen of French Cooking, none other than Julia Child!
Now, it's been a while since I've made croissants. I first attempted to make them years ago for a brunch party I was throwing at my first home, circa about 2001. I didn't understand the CRUCIAL importance of all of the steps and the folds and thus, my croissants came out a bit like hockey pucks. Flat, a little too buttery (there is such a thing) and too tough. So sad, but, everyone has a bad day. Back then, I had a lot of them in the kitchen. I learned a lot of baking tips since then and made croissants again while attending pastry school at the Institute of Culinary Education. For that post and to walk down my memory lane at pastry school, check out Heidi at ICE.
Anyway, just a couple of VERY SIMPLE things that I've learned that help this (and many other) recipe go much more smoothly.
1. Always assemble your needs in advance. This includes ingredients and equipment/tools. Make sure you've got what you need before you start so you don't end up running to the grocery store in socks and pjs while your yeast is dissolving...
2. Read through the recipe in its entirety. For this recipe in particular, there are many steps and some of them involve resting dough for hours (or overnight), so reading in advance helps you prepare and anticipate your timelines. You don't want to start a cheesecake you need for this evening at 11:00 am, or it won't have time to cool, chill and set before you take it with you!
3. Get a camera! Finally, I am learning to have a camera nearby, so I can show off my creations. Fantastic if you are making something you've never made before. Don't you want to be able to brag about the stuff you made?
Monday, September 26, 2011
Linzer Torte
This fantastic dessert, named after the city of Linz, originates in Austria. It's one of the oldest cakes in the world, dating back to 1653. The pastry is a very short, crumbly dough made of sugar, flour, ground blanched almonds, eggs, butter and spices/flavorings. It's typically spread with a thin filling of preserves (traditionally current, but often raspberry or apricot) and then covered with a lattice top using the pastry dough. Because of the leavening agent (baking soda) in the dough, the crust rises in the oven and puffs up to cover the filling. This dessert is seriously all about the crust! If you remember from previous posts, the fact that the pastry is a short dough means that there is a lot of butter. The butter keeps the dough from toughening after the flour is combined with the liquid.
Friday, September 23, 2011
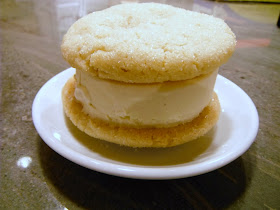
Snickerd-ooh-dles!
I really wanted to sandwich something today, and I promised I would figure out a way to use up some of the many egg yolks I had hanging out in my fridge.
When I was a kid, my mom would use extra egg yolks to make us a Polish treat called Kogel Mogel. It's basically egg yolks mixed with sugar and sometimes rum *I think*. Hmm...not many people would think of feeding their children a highly-sugared, alcohol-spiked treat made out of raw eggs! But we loved it!
That is NOT what I am going to do with my extra yolks! I'll start with a batch of custard-based ice cream ("French style"), flavor = cinnamon. It's starting to become a little fall-ish outside, which makes me think of cinnamon. But, it's still warm enough to enjoy an ice cream sandwich.
The cookies I decided to make are a variation on a classic sugar cookie recipe that uses yolks only. The recipe is all over the web, called Egg Yolk Cookies. But, that name just sounds unappetizing to me, so I am going to call them resourceful Sugar Cookies!
When both components are done, what we'll have is a Sugar Almond Cookie with cinnamon ice cream sandwich. Sounds yummy, doesn't it?
Ok, let's get started.
Wednesday, September 21, 2011
New Flavors!
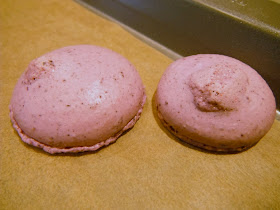
I wanted to try (to conquer) some new flavors of macaron today, plus I promised Todd that I'd make him something with chocolate and espresso. So...today I made three flavors of macaron: a repeat of the plum flavor I made a couple weeks ago (they were just so good!), a chocolate macaron with chocolate espresso ganache (I threw a touch of Kahlua in there for good measure), and a Marion Blackberry flavor. I had hoped to make a macaron using some kind of unusual frozen fruit from the grocery store (I was thinking passion fruit or guava), but they didn't really have any "unusual" fruits. Back when we were in NYC, I could buy fruit purees, just about any kind, at lots of locations throughout the city. But, the Marion Blackberries were really pretty and came in a nice biodegradable bag, which pretty much sold me on them. Ha ha!
I also bought some freeze-dried blueberries (couldn't find blackberries), which I ground into a powder and added to the macaron batter for the blackberry flavor. It gave the cookies a nice speckle and added to their flavor.
I'm somewhat lacking in photos today, it was cloudy and overcast and we don't have much natural light back here as it is. I snapped just a few pics, will try to get some more tomorrow to show off the details!
I will share a few recipes today, for my macarons, as well as some insight on the outcomes and tips/suggestions/ideas.
Berry Macaron with Marion Blackberry Jam
makes about 60 filled 1" macaron
5 oz egg whites (aged 24 hours at room temp, followed by 24 hours in the fridge)
0.8 oz freeze-dried blueberries (blackberries would have been ideal)
6.35 oz powdered sugar
6.35 oz almond meal
6.8 oz sugar
2 oz water
Process blueberries in food processor, along with powdered sugar and almond meal. Sift and set aside in a large bowl. Divide the egg whites in half and set one half aside. Beat the other half to firm peaks with a stand mixer. While whites are whipping, heat sugar and water in a saucepan to 244°F. When sugar water is at temp and whites are at firm peaks, turn off mixer and pour hot sugar into whites then immediately begin whipping again at high speed. This creates what is called an Italian Meringue. When the meringue has cooled to just slightly warm, add the extra egg whites to the dry mixture, followed by the meringue and use a folding motion to incorporate all of the ingredients. The batter, when mixed appropriately, should be the consistency of molten lava...Not that that's a concept that most of us will be very familiar with in real life, but you'll probably figure it out!
Pipe the macaron onto a parchment-lined sheet pan, double-stacked. Today, I baked 330°F, just to see what the extra 5° would do for me. I still baked all cookies on double baking sheets, but I did notice an impact using some new (thinner/cheaper) baking sheets. Since the double sheet is supposed to protect the bottoms of the macaron from browning or heating too much, I did realize that the bottoms of today's cookies were crunchier than past batches. (A little too much so.) Not sure if this is from the thinner pans or the extra 5°. Will bake on these pans again at 325°F and see what happens. I also baked this batch of macaron without letting them sit at room temperature. Overall, the MOST IMPORTANT thing I learned today is something I warned all of you about just the other day. If the macaron have peaks on top that don't settle out, it's very important not to overwet them. I think I used too much water on my fingertip to smooth the peaks and ended up compromising the integrity of the cookie shell for many of the first batch. This batter was slightly too thick, so I'd probably cut back a little on the quantity of dry ingredients next time. Cookies were DONE (no question) by 14 minutes in the oven and removed easily from pans. I ended up with half of this batch being "macawrongs" because of my overzealous wet finger.
Blackberry Jam
makes about 1 cup jam
1 cup mashed blackberries
1/4 cup agave syrup
2 t pectin
Heat blackberries over medium heat to a boil. Mix pectin with agave syrup. Once blackberry mixture is at a boil, remove from heat, stir in pectin/syrup mixture and stir well to dissolve. Place back on the heat and cook, stirring well, for a couple minutes. Remove from heat. Since I don't have equipment to can at home, I just poured this into an old glass jar (while hot), screwed the lid on and let it cool. Once cool, I refrigerated and will use within a few weeks. If you want to can this to store for a longer period of time, you should probably check out another resource on canning like this. Or this. Once this sits overnight in the fridge, the pectin has a chance to work and the jam thickened completely.
I filled some of the macaron with the jam itself and, the other half I filled with a buttercream mixed with a 1/4 cup or so of the jam. Both combinations were good, and a touch sweeter than I'd have preferred.
Chocolate Macaron with Chocolate Espresso Ganache
makes about 40 filled 1" macaron
3.2 oz liquid egg whites (pasteurized from a carton)
1 t meringue powder
3.8 oz powdered sugar
3.8 oz almond meal
1 oz cocoa
4.3 oz sugar
1.1 oz water
Process cocoa, powdered sugar and almond meal in a food processor. Sift and set aside in a large bowl. Divide the egg whites in half and set one half aside. Beat the other half (along with the meringue powder) to firm peaks with a stand mixer. While whites are whipping, heat sugar and water in a saucepan to 244°F. When sugar water is at temp and whites are at firm peaks, turn off mixer and pour hot sugar into whites then immediately begin whipping again at high speed. When the meringue has cooled to just slightly warm, add the extra egg whites to the dry mixture, followed by the meringue and use a folding motion to incorporate all of the ingredients.
For this batch, I was hoping to see the impact of using pasteurized, packaged egg whites. I did put a teaspoon of meringue powder in with the whites, hoping to strengthen the structure. Overall, though, I would say that this batch was largely a flop. Actually, when I first took them out of the oven, the looked nearly PERFECT. I think I even said, "A batch of perfect chocolate macaron!" But, not 2 short minutes later, the tops were all wrinkling and then they almost all cracked when I picked them up off the parchment. Like the top of a brownie, you know how it gets that paper-thin wrinkly top? The cookie was chewy, too, like a brownie. Hmmm, I'm not going to lie, it was really good, but didn't have the texture that a macaron is supposed to have. I think what happened here is that the batter may have been overmixed. Either that or the meringue wasn't strong enough because of having used pasteurized egg whites. I read that using pasteurized whites was not a good idea, because apparently the temperature at which eggs are pasteurized at is similar to the temperature at which proteins become denatured, which would likely ruin a successful meringue. So, for NOW, I will not be planning to use pasteurized egg whites any more. It was a cheap shot, but I had them in the fridge and I was trying to devise a way to limit the number of lonely YOLKS I have! (Those who know me well can predict that I will be posting egg yolky recipes in the next few days!!) If you have any suggestions or special requests, post a comment and I'll see what I can come up with...
So, on with the chocolate espresso ganache...
Chocolate Espresso Ganache
makes about 2 cups
8 oz chopped chocolate
10 fl oz cream
2 t instant espresso
2 t Kahlua (optional, but seriously, why not?)
Place chopped chocolate in a bowl. Heat cream just to scalding and dissolve espresso powder in the hot cream. Pour over chocolate, wait 2 minutes then whisk smooth. Add in the Kahlua if using. Allow to settle and harden at room temperature or in the fridge for a bit. Whip with a hand mixer before using to lighten and soften.
So, Heidi's lessons learned about macaron from today's marathon:
1. My ideal temperature (in this oven) seems to be 325°F, 330°F was too hot.
2. I will not be using pasteurized egg whites again.
3. Aging whites seems to be a good idea.
4. Letting the macaron sit on the counter to form a skin before baking also seems like a good idea.
5. No more wet fingertips on the macarons! Oh, and
6. Have fun, keep testing, keep learning!
Monday, September 19, 2011
(Macaron) Paradise Found...
I am shell-shocked (macaron shell, that is), floating in a sugar-buzzed paradise. Some of you who have been to Paris may understand me when I speak of macaron bliss. They are just so...yummy. A perfect combination of flavor and texture, smooth and crunch and moist and sweet. Melt in your mouth good.
I can tell you that WAY TOO MANY of these melted in MY mouth today. I've been experimenting with macarons lately and decided to try my hand at a pistachio flavor after spying a half-bag of shelled pistachios in our pantry. (Shelling enough pistachios to make cookies and filling would have taken all day in and of itself, so I'm happy to have a source for shelled ones.)
The nice thing about macarons is that the flavors and combinations are limited only by the imagination. (The actual outcome is limited by much more, including the heat and humidity of the house, the temp of the oven, the consistency of the batter, the age of the egg whites, the number of pans, the amount of time you let the macaron sit before you bake them!)
I decided to test some of these theories, as well as to put together a recipe entirely from scratch, in the making of these pistachio macaron (macaron de pistache). How 'bout that?!?! OOOH LA LA!
Pistachio Macaron
makes about 100 filled macaron, approx 1"
5.2 oz egg whites (I did not age these at all, they came right out of the fridge)
3.5 oz almond flour
3.5 oz pistachios, finely ground
7 oz powdered sugar
7 oz granulated sugar
1.7 fl oz water
Preheat your oven to 325°F. Prepare baking sheets by cutting parchment paper to fit. You will also need to double-stack your baking sheets, so make sure to use ones that fit into each other.
Begin by pulsing powdered sugar, almond flour and pistachios in a food processor until homogeneous. Depending on how finely the pistachio was ground, you may or may not decide to sift the mixture. (I did not, since I couldn't grind the pistachio finely enough and didn't want to lose it in the sifter.) Place in a large (HUGE) bowl and set aside. Divide your egg whites in half (exactly, I use a scale), placing half in a small bowl and the other half in the bowl of your stand mixer.
Place granulated sugar and water in a small saucepan and cook over medium-high heat until the sugar syrup reaches 244°F. While the sugar syrup is cooking, you can go ahead and get the mixer going, the egg whites should whip to firm peaks. If they are not there by the time your syrup is close to temperature, go ahead and turn the mixer up briefly to high just to make sure that the whites are firm. Once the syrup is at temperature and the whites are firm peaks, stop the mixer briefly and dump the sugar syrup into the whites. Immediately turn the mixer on high (do not let this sit for any amount of time or the sugar syrup will begin to solidify) and whip until resulting meringue has cooled.
Pour the reserved egg white over the dry mix, then add the meringue. Use a spatula to fold both into the dry mix, aiming for a consistent and smooth batter that flows like LAVA! (Someday soon I will take a video clip of this and post.)
Place the batter into a decorating bag fitted with a round tip (I used a #9) and squeeze a small amount under each corner of the parchment paper, just to secure it while baking. Using a squeezing motion (not circular), pipe equal sized amounts of batter evenly across the baking sheet, leaving an inch or so in between to allow for the spread of the batter. If your macaron have peaks or tips on them, you can very carefully dab a finger into some water and gently tap on the peak to smooth it out. Water should not get on the cookie, just help your finger to keep from sticking.
When the tray is full, you can gently tap the baking sheet against the counter. Some people recommend letting the macaron sit at room temperature for 30 minutes to several hours to form a skin prior to baking, but I am not convinced this is necessary. I popped these right into the oven.
After about 5-7 minutes in the oven, you should start to see the macaron "rise" onto its "feet." This is the MOST exciting part!! Except when it doesn't happen. Most of today's macaron did rise up on their little frilly feet, so I was happy! Total baking time depends on the size of the macaron, but I baked each tray for approximately 14 minutes at this size. The macaron are ready when they only move slightly on their feet if you nudge them.
Take the tray from the oven, let the macaron cool briefly before removing them from the parchment.
Since these macaron were actually made with pistachios, I expected the cookie itself to have a pistachio flavor. AND IT DID! Yum. Often, the flavor of a macaron is most pronounced within the filling that is chosen. I couldn't decide what to sandwich inside of these, so I tried a number of different fillings. And....I'm gonna tell you which one I liked the best. (Todd agreed with me, without my prompting.)
I knew I'd want a pistachio filling, but wasn't sure if chocolate would be complimentary or overwhelming. I made a pistachio paste using the following (rough) recipe.
Pistachio Paste
makes about a cup
4 oz pistachios
1 oz almond flour
1 drop almond extract (optional)
2 oz sugar
~ 1 T water + 2 tsp water
Grind pistachios with almond flour in a food processor, add 1 drop almond extract and mix, set aside. In a small saucepan, heat sugar with 1 T water over medium-high heat to make a sugar syrup. Cook to about 250°F, remove from heat and immediately blend into the pistachio mixture until homogeneous. Add a teaspoonful of water, one at a time, until the paste is of the desired consistency. Store in a plastic bag in the freezer. Keeps for, oh, I don't know, say about a month. I just made it today, so it can be used right away. This can be added to ganaches, buttercreams, etc, to impart pistachio flavor.
I made the following combinations:
1. pistachio macaron + dark chocolate ganache filling
2. pistachio macaron + dark chocolate pistachio ganache filling
3. pistachio macaron + buttercream filling
4. pistachio macaron + chocolate buttercream filling
5. pistachio macaron + chocolate pistachio buttercream filling
6. pistachio macaron + pistachio buttercream filling
In general, the chocolate ganache fillings just didn't work with this. The flavor was too strong and overwhelmed the delicate flavor of the pistachio in the macaron. The pistachio macaron with (plain) buttercream was good, but definitely missing something. There were 2 combinations I felt were "pretty good (#4 and 5 above)," and one that was a homerun (#6). Yes, the pistachio cookie with the pistachio buttercream filling was JUST RIGHT. So much pistachio flavor and chewy, crunchy, moist, silky goodness.
Paradise Found...
Sunday, September 18, 2011
Going to the State Fair...
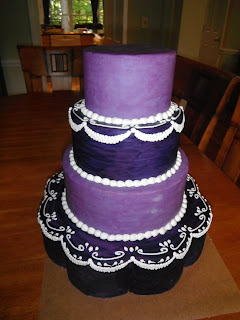
I have been wanting to enter a decorated cake into the North Carolina State Fair since at least 1996. I've even submitted an application, twice. But, I never did the planning and organizing that comes along with putting together a cake like this until this year. Applications were due by September 13th and mine has been submitted!
I'm entering the Category W (Culinary) Class 101, W03103: Novelty Shape and Design—Buttercream Frosting, Fondant Icing, or Royal Icing; Your Choice of Decoration Medium(s). In case anyone else wants to know, the *top* prize is $25. Yes, 25 whole dollars. I promise I'm not doing this for the money. Ha ha!
So, I've decided on a Margaret Braun-inspired cake, 4 tiers, primarily colored in purple with accents of gold and pearl, as well as highlight colors of teal and coral. The cake will be decorated with swags, pearls, keys, locks and treasures. I'm calling it "Old Secrets." I did a rough sketch, although a few details have since changed.
I'm planning to work on the cake a few hours per week between now and early October. It's due by October 9th (I think). Because this competition is strictly based on decorations, the cake layers themselves are not real, they are styrofoam cake dummies. But, part of the judging considers that the cake must be able to be made to be entirely edible otherwise. The other criteria for judging:
I. Overall appearance......................................................50 points
- pleasing appearance
- appropriate for occasion
- shows originality
- colors appropriate
II. Techniques and Designs.................................................50 points
- demonstrates decorating skills
- repetitive designs should be consistent
- if Styrofoam used, the same techniques should be possible with real cake
So, I after polling my friends on colors (purple won out by a landslide, but let's face it, purple is my absolute favorite color, so I kinda wanted to make it purple anyway), I began by making the fondant on Tuesday of last week.
Fondant (or rolled fondant) is a sugar-based, rollable cake covering that can be easily purchased at your local craft or cake decorating store. But, it's also pretty easy to make and much, much cheaper. I knew I'd need about 10 pounds of rolled fondant just to cover my cake, so I set out to make 4 batches.
Rolled Fondant
makes about 2.5 pounds
2 lb powdered sugar
1 T unflavored gelatin
3 T cold water
1/2 c light corn syrup (or "glucose")
1 1/2 T glycerin
1 T vanilla or other flavor (omitted for this, since no one will be tasting)
Sift the powdered sugar into a Kitchen-Aid mixing bowl (although I often don't believe in sifting, it is necessary for this to be sure there are no lumps in your fondant) and set aside. Sprinkle the gelatin over your water inside a small saucepan. Allow it to sit for 5 minutes or so to bloom/soften. Dissolve over low heat until transparent, then mix in the corn syrup, glycerin and vanilla (if using). Add in any colorings. (I used a 3:1 ratio of red to blue to make the dark purple.)
Set the bowl of powdered sugar on your stand mixer, with the paddle attachment on low speed. Gradually add in the liquid mixture and continue mixing until well combined. Scrape out (it will be sticky) onto a clean work surface and knead until smooth and pliable. (Some people say to use powdered sugar to dust your kneading surface, others say cornstarch. Definitely don't use flour. I actually use a spray or two of Pam and find that makes my fondant the nicest consistency and prevents sticking while kneading.) Fondant should be wrapped tightly and then placed in a zip-top plastic bag for storing. It's not necessary to refrigerate.
I made 3 batches of the dark purple fondant and one final batch of plain white.
Before you begin rolling or working with fondant, go into the bathroom and cut all of your fingernails. At least to the finger, if not all the way off. The tiniest piece of fingernail can rip or tear the fondant, which will not make you very happy. Once made, the fondant must be allowed to sit overnight in order to firm up. It will then need to be kneaded vigorously (possibly with a 10-15 second nuke in between to soften) to become pliable enough to roll out. Once it is warmed and pliable, roll out on a flat surface (I use cornstarch here, but lightly only) until the diameter reaches the diameter of your cake plus twice it's height. My bottom layer is approximately 14 inches in diameter and 4 inches high, so the fondant was rolled to a little over 22 inches. Do your best to keep it roughly a circle and pick it up periodically, redusting your surface so it doesn't stick. It should be rolled to about 1/4" thick.
Once the fondant is of the correct size, it's time to move. In order to provide a surface for the fondant to adhere to, I brushed my styrofoam "fake cake" with water then laid the fondant on top as evenly as possible. At this point, many people think they still need to be freaking out. As far as I'm concerned, once the fondant is ON TOP of the cake layer, the freaking out can cease. Now, just do your best to efficiently and neatly smooth first the top of the cake, followed gradually by the tops of the sides, then the middle, then finally the bottom of the sides of the cake. You should be able to pull and tug a little at the fondant draped around the bottom in order to make it fit. I usually use my hands or a fondant smoother to smooth the fondant all over the cake, then a sharp knife to bevel and cut the bottom edge.
I covered both the ~14" bottom tier and the 8" tier with dark purple fondant and set them aside to dry. Because I wanted the other two tiers to be a complimentary (but lighter) shade of purple, I wanted to avoid having to mix food colors in order to tint it. It's very hard to match a color exactly. I simply took most of the batch of pure white fondant I'd made and kneaded it in with the remaining purple and the resulting color was a lighter shade of purple, same tone as the other two layers. I rolled the lighter fondant out and covered my 10" and 6" layers and also set them aside to dry.
On Wednesday, the fondant coverings were mostly dry (no longer as susceptible to fingernail sticks!). Now, I began to paint the fondant. I've found that it's OK to paint fondant using a water-based food coloring, but it should be diluted using alcohol (vodka or lemon extract) in order to paint on without making the fondant sticky. I mixed up a purple similar to the colors of the fondant and painted over top for texture. I wanted to have visible brush strokes, particularly on the dark purple layer.
Once all layers were dry (overnight), it was time to stick them together and begin to pipe some decorations. I used Royal Icing (a liquid icing that dries incredibly hard like candy) to cement the cake layers together and also for my piped decorations.
Royal Icing
makes about 3 cupes
3 T meringue powder
1 lb powdered sugar
6 T warm water
Sift the powdered sugar and meringue powder into a bowl. Beat with the water for about 7-10 minutes, until stiff peaks form. Since this recipe is made without liquid egg whites, it can remain at room temperature.
Royal Icing can be placed into an icing or decorating bag and piped onto the cake using the decorating tip of your choice. I used a #5 tip to pipe pearls, borders and the swags surrounding the two tiers.
Now, the icing must be allowed to dry, at least overnight, before painting. Next up, more fondant decorations, embellishing the royal icing decorations with gold and pearl dust and finally, making gum paste keys, locks and the treasure chest for the top. Stay tuned to this work-in-progress...
As American as...
Apple Pie!
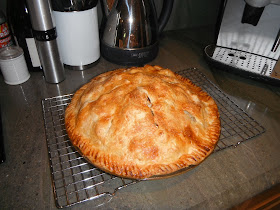
When we invited my neighbor and friend over for dinner on her birthday, I knew I'd have to bake a pie. Trudi's been telling me for years that apple pie is her very favorite dessert. Luckily, I found some beautiful (and gigantic, I might add) apples at the store and I was on my way. (I should brag that I was able to peel the entire apple in one string of peel in 6 out of 8 of the apples I used. I know, I'm cool.)
I'm also testing out some new ice cream recipes, specifically some from Jeni's Splendid Ice Creams at Home, a new ice cream cookbook that I pined for all summer and just received as a late birthday present from my brother-in-law Brian. Although I'd previously seen some of the flavor combinations in Jeni's book, I didn't realize that her recipes are not egg-based, like a traditional custard. In the past, I'd snubbed my nose at (I know, can you imagine?) those "Philadelphia-style" ice creams, but I've now opened my mind and decided that I definitely won't know until I try them. Jeni's ice cream's use starch as a thickener (corn starch or tapioca) and also add a small quantity of a liquid sweetener (she uses corn syrup, but I've subbed agave nectar), in addition to a little cream cheese.
I made two ice creams from Jeni's book this weekend (Classic Vanilla Bean and a very unique Olive Oil with toasted pepitas), either of which would go nicely with this apple pie.
So, to deconstruct this very classically American dessert, I'd like to take a few minutes to chat about pie crusts. The American style pie crust almost always contains shortening ("Crisco") instead of, or in addition to, butter. But, this hippie chick does not do Crisco. Not if I'm planning on eating it anyway...(Hmm, lol). So, I have become a believer in pie crusts made entirely with butter. Don't get me wrong, I'm not saying that an all-butter pie crust is "healthy," but it's definitely better than Crisco and tastes SO. MUCH. BETTER. Did you know that vegetable shortening does not have any taste? The role of vegetable shortening in an American-style pie dough, though, is to repel water and create the characteristic flakiness that people want in their crust.
Guess what? There is another way. The key (and this is real valuable info I'm sharing here) to an absolutely delicious, flaky, pie dough is in the handling of the dough. Don't overwork the dough. And, most people who think they are making the dough just "come together" have already overworked it. Now, I know how good it feels to knead the heck out of some dough. But, if you want to do that, please, make bread. Basically, to paint a mental picture, if you have to scoop up little crumbs of dough that have various sizes of visible butter into your plastic wrap, you're looking at a nicely done pie dough.
The dough spends a little time in the fridge, just to firm up and make certain that the butter doesn't become too homogeneous in the dough when it's being rolled out. Once it's been rolled out, it's usually a good idea to put the pie in the fridge again (or even freezer for 10 minutes or so), just to make sure that those visible chunks of butter" stay in chunks when it hits the hot oven. This has the effect of immediately melting the butter, which releases water as steam, which rises those pieces of dough into the air so they can hit the heat and brown. Thus, your flaky, American, all-butter pie dough. See, that wasn't so hard. Just remember not to work the dough too much.
While the crust is chilling, you can make your filling. Like I said above, I selected 8 gigantic apples (4 Granny Smith and 4 Fuji, a mix is always nice), peeled them and removed their cores. (As an aside, my favorite way to remove the core is by using a melon baller once the apple has been cut in half. It gets that core out nicely and you don't loose valuable apple.) I slice each apple half into 8 wedges, then cut each of those wedges in half. Apples contain a lot of water, so when they bake, they will settle within the pie, Making the slices smaller and uniform like this helps keep the height of your pie as predictable as possible. (Another thing you could do is bake the apples in the oven in advance to release the water, or you can place the sugared apple slices in a sieve for an hour or so before you construct the pie. Same outcome.) But, I kinda like all that yummy liquid that comes out in there and, as long as you make your pie crust thick enough and bake it long enough, it should still stand up to the liquid.
So, put these apples in a big bowl (huge), add the zest and juice of 1/2 lemon (about a tablespoon). In a separate bowl, mix about 1/2-3/4 c sugar with 2 T flour, 1 t salt, 1 t cinnamon and about 1/4 t ground nutmeg. (I always grind my own. If you buy whole nutmeg, you can grind it using your lemon zester and the unused nutmeg goes right back in the can for the next time you need it. One nutmeg lasts me a long time and would probably last you even longer.) Mix these dry ingredients in with the apples, making sure that all slices get coated.
**If you like lots of spice, you could definitely add more of either of these or experiment with adding allspice, ginger or even other ingredients to your mix (raisins, cranberries, toasted nuts, etc).**
When you are ready to roll out the dough, set the oven to a high temperature of 500°F and place a cookie sheet on the bottom rack. Remove one disk of dough from the fridge and roll it out on a lightly-floured counter until it's a few inches larger than the diameter of your pie pan. I used a 9" pie pan, so I rolled the dough to about 13" to allow for the sides and a little overhang. Place your apple filling in the crust, then put this in the fridge while you remove and roll out the second piece of dough. The second/top piece can be rolled slightly smaller, I went to about 12". Remove your pie from the fridge, place the second piece of dough on top and press the edges of the 2 crusts together, folding them under along with any overhang. You can crimp the edges using a fork or your fingers.
Provided your oven is at temperature and your pie is still cool, you can pop that sucker in the oven immediately. Like I said earlier, if you need to refrigerate or freeze it for 10 minutes, that's fine too. Just before putting it in the oven, brush the crust with egg white and sprinkle with sugar. (I used demarara sugar or coarse sugar.) Place the pie on the preheated cookie sheet, close the door, then immediately turn the temperature down to 425°F.
Bake at 425°F for about 25 minutes, or long enough to get a beautiful brown color developing on the crust. Once it's nicely browned, again decrease the temperature to 375°F and bake for another 35 minutes or so.
Remove from the oven and allow to cool on a wire rack for a few hours before serving.
All Butter Pie Dough
Yield: one double pie crust (or two singles)
2 1/2 c flour
1 T sugar
1 t salt
8 oz cold, unsalted butter, cut into small cubes
ice cold water
Whisk the flour with the sugar and salt in a large bowl. Sprinkle cubed butter over the dry ingredients and use your hands or a pastry blender to work the butter into the flour. Continue to work until remaining butter is pea-sized pieces. Do not overwork or overmix the dough. Gradually add ice cold water to the mix (start with ½ cup and plan to add another 2-4 Tsp beyond that). Stir in the water just until the dough begins to come together. Gather the dough, divide it in half and wrap each half in plastic wrap. Chill in the refrigerator for at least an hour, but can be stored for about a week.
Apple pie is really not complete without the "a la mode," so now I'm going to talk about ice creams.
There are 2 styles of ice cream, French style and American or Philadelphia-style. The French style of ice cream involves making a custard by cooking milk and/or cream and tempering egg yolks with the hot mixture. This addition of the hot liquid to the egg yolks stabilizes the mixture and creates a thickening reaction when cooked over more heat. Because of this, ice creams made using the French custard method tend to be richer and silkier. The amount of egg yolks, as well as the milk/cream ratio, vary tremendously among recipes. Most recipes will tell you to use whole milk, but I've found 1% to be perfectly adequate. There are a couple of potential downsides to this method. First, since most people are not used to cooking a custard over heat, there is a reasonable likelihood that the custard may get overcooked or curdled. Sometimes the ice cream can be saved after pushing the custard through a fine-mesh sieve, but sometimes not. My advice on this is just to cook the custard slowly at first until you get the hang of when and how it thickens. Oh, and stir constantly at that stage. Second, since custards are, by definition, HOT, the resulting mixture will need to undergo significant cooling before you can freeze it in your ice cream machine.
The American or Philadelphia-style of ice cream isn't made with eggs at all. Usually just a mixture of milk and cream, with sugar and flavorings, perhaps some additional thickeners, this ice cream can be made in a fraction of the time of a traditional custard. In the past, I'd heard that these ice creams tasted as if they were missing something and that the texture was different than a standard ice cream. Not so with Jeni's recipes. I don't know if it's the cream cheese or the starch, but the consistency of the two ice creams I made was beautiful! And the taste, outstanding! As I mentioned above, I didn't really want to use corn syrup, so I substituted agave nectar which worked fine. With the olive oil ice cream, the amount of cream is reduced, since the mixture gets some fat from the oil. Oh, and pepitas are pumpkin seeds, shelled. If the ones you find are not toasted or salted, you can just toast them in a skillet over medium heat with a little olive oil, then salt them and cool.
Vanilla Bean Ice Cream
makes about 1 quart
2 c milk
1 T + 1 t cornstarch
1.5 oz cream cheese, softened
1/8 t fine sea salt
1.25 c cream
2/3 c sugar (I use less, about 1/2 c)
2 T light corn syrup (I used agave nectar)
1 vanilla bean, split in half and seeds scraped out
Mix about 2 T milk with the cornstarch in a small bowl to make a slurry. Whisk the cream cheese with salt in a medium bowl. Cook the remaining milk, cream, sugar and corn syrup, along with the vanilla (+ bean pod) in a saucepan over medium-high heat. Bring to a boil and boil for 4 minutes. Remove from heat and add the cornstarch slurry. Bring back to a boil and cook until slightly thickened, a few minutes. Remove from the heat and whisk into the cream cheese until smooth. Cool your mixture in an ice bath (submerge in a larger bowl with ice and water) until cool. Remove the vanilla bean pod before spinning in your home ice cream machine.
Olive Oil Ice Cream with Sea-Salted Pepitas
makes about 1 quart
2 c milk
1 T + 1 t cornstarch
1.5 oz cream cheese, softened
1/4 t fine sea salt
1 c cream
1/2 c sugar
2 T light corn syrup (I used agave nectar)
1/4 c olive oil
1 c salted roasted pepitas
Mix about 2 T milk with the cornstarch in a small bowl to make a slurry. Whisk the cream cheese with salt in a medium bowl. Cook the remaining milk, cream, sugar and corn syrup, along with the vanilla (+ bean pod) in a saucepan over medium-high heat. Bring to a boil and boil for 4 minutes. Remove from heat and add the cornstarch slurry. Bring back to a boil and cook until slightly thickened, a few minutes. Remove from the heat and whisk into the cream cheese until smooth. Whisk in the olive oil. Cool your mixture in an ice bath (submerge in a larger bowl with ice and water) until cool. Spin in your home ice cream machine. Layer the pepitas in with the ice cream as you spoon the mixture into containers for freezing.
Friday, September 9, 2011
OMG, Macarons!
Known as one of the hardest things for a pastry chef to master, the French treat known as a macaron is truly a myriad of challenges. I've attempted macarons many times, and have had an endless number of problems: flat macaron, cracked macaron, macaron with no "feet," macaron that were too light, too dark and macaron that stuck to the paper. But today, things finally fell into place! I've never blogged my macaron adventures before, but I'm ready to show some pictures today. I can't wait to create other combinations and flavors!!
Many sources attribute the origin of the macaron to Pierre Desfontaines of the famous Paris pastry shop Laduree. Now, macaron are being sold all over France, in some major cities in the US (I know there are a few shops in NYC that sell macaron), but this is not a treat that's available in most local groceries or bake shops.
Macaron should not be confused with another similarly-spelled cookie, the macaroon. Macaroons are a much heavier almond cookie, often made with coconut. The macaron is something different entirely. It's made from only 4 basic ingredients: almond flour (ground up almonds), powdered sugar, egg whites and regular sugar. The basic concept is to mix the dry ingredients into a meringue, but there are MANY different theories as to the best way to do that. The first recipe I attempted yesterday came from Today's Nest. Unfortunately, the macaron never did raise up off the baking sheet, so it didn't get the characteristic "feet" that a macaron is supposed to have. I went in search of more information and made another several batches, adjusting the ingredient ratios and the oven temperature. I even threw some cocoa powder into a batch and made chocolate macaron, with feet and all. So, there really isn't a specific "recipe" that I followed, but I ended up using a ratio of 1.35-1.5: 1 for each ingredient relative to the amount of egg whites I used. For the chocolate macaron, I removed an ounce or two of the other dry ingredients and replaced them with cocoa.
A few things that I learned (and this may NOT apply to your home, your oven):
- 310 F is too low of a temperature in my oven. 325 F was much better.
- Baking on double baking sheets is helpful.
- It did not make a difference whether I left the piped macaron to sit out before baking, I did it both ways and didn't see a noticeable difference.
- I did not find it necessary to prop the oven door open with a spoon to let heat out while baking.
- I sifted the powdered sugar and almond flour together, then processed in a food processor, then blended with a whisk to make sure there were no clumps.
- The egg whites I used were aged 24 hours at room temperature. I'm not sure if this made a difference, because I only used those whites.
The basic steps:
Blend your powdered sugar with the almond flour and set aside. Make a meringue with the egg whites and sugar. This can be a simple meringue, made by whipping egg whites to firm peaks, adding in the sugar and then blending into the dry ingredients. However, I found it easier to make an Italian meringue by cooking a sugar syrup (to about 244 F) and then pouring over whipping egg whites.
This mixture is then folded carefully into the dry ingredients. Once the mixture is smooth (DO NOT overmix), it can be piped into circles on parchment-lined baking sheets.
Macaron can be fickle and VERY frustrating, but they are also really beautiful, unique, extraordinarily delicious and one of the most versatile treats. If you can dream it up, you can put it in a macaron. Today's flavors are vanilla plum, chocolate/chocolate and chocolate chai.
Plum Buttercream
I wanted to make plum macaron because I'd never had them before and because plums are in season. I bought about 2 pounds of plums, pitted and chopped them and put them in a saucepan with some sugar and cooked the mixture down until it was thick and syrupy. I had hoped to strain out the solids, but to be honest, I couldn't get anything through my strainer, so I put it all back in the saucepan and cooked it a little more. I pureed the mixture using an immersion blender and added it to a classic Italian buttercream.
The finished product
Wednesday, September 7, 2011
Lemon Shortbread Cookies with Fig Ice Cream
Yes, you read correctly! Fig ICE CREAM! Figs are perfectly in season right now and they are SO good, so I decided to make them into an ice cream and then sandwich it between a complimentary cookie. Even though the summer season is winding down, it's still upper 80s here in NC, so I'm makin' ice cream!
I bought about 20 Black Mission Figs, as ripe as I could find. A ripe fig feels like it just might burst if you squeezed it. I chopped up the figs and put them in a saucepan along with some water and some sugar and then cooked it down until it was all a sticky, gooey, mess, kinda like jelly with chunks of figs in it. I pureed this in the food processor and added some cream, some milk and a little lemon juice to temper the sweetness. Once the mixture was chilled, the whole thing got spun in my trusty ice cream machine. Voila, Fig Ice Cream!
Fig Ice Cream
adapted from David Lebovitz
Ingredients
about 20 fresh figs
1/2 c water
zest of one lemon
2/3 c sugar
1 c heavy cream
1/2 c milk
1/2 tsp lemon juice
Directions
Cut the stems from the figs, chop them roughly, and place them in a medium saucepan along with water, sugar and lemon zest. Cook over medium until the figs are tender and the mixture becomes thick and sticky, with the consistency of jelly. Cool, then blend in food processor with cream, milk and lemon juice. Chill and then spin in ice cream maker.
Moving on to the cookie. I think fig goes well with a number of other flavors. Nuts, for one, particularly I think of almonds. Figs also go well with citrus, orange or lemon. I had a beautiful large lemon at home, so I decided to go with lemon shortbread. Shortbread cookies are so named because the amount of butter in the cookie serves to "shorten" the dough. (This is also how shortening got its name.) When making baked goods, any liquid added to flour allows for the development of gluten, which is a protein that toughens the structure and adds elasticity and stretch (think of bread dough being worked, that's got a lot of gluten). But, with these cookies, you don't want stretch, you want crumb, so butter is added to essentially "shorten" the strands of gluten produced and limit the elasticity of the dough. If you want to see how elastic shortbread dough is, blend it really well, then pull the ends apart. You will not see any stretch, it will just break apart. So, there's a quickie on shortening, and shortbread cookies. Now, let's bake!
Lemon Shortbread Cookies
adapted from The Joy of Cooking
Ingredients
8 oz unsalted butter, room temperature
2 tsp lemon zest
1 c sugar
1/2 tsp salt
1 large egg yolk
1 large egg
2 tsp vanilla
2 1/2 c flour
Cream butter, with lemon zest, sugar and salt, then add egg and yolk until combined. Add in vanilla, then reduce the speed and add in flour until just combined. Smush down the dough some, divide it in half and wrap it in plastic wrap. Allow to cool in the fridge for at least an hour.
Preheat oven to 375°F, and separate your two oven racks. Roll out the dough to about 1/8 inch thick on a floured surface. Cut out shapes using cutters. Unused dough may be re-rolled one time.
Bake until the cookies are slightly golden brown at the edges (about 8 minutes, depending on the thickness of your cookies). Transfer to a rack and cool to room temperature.
All in all, I found the flavor of the lemon shortbread to be quite complimentary to the fig ice cream. The first time I made it, the shortbread cookie was fragile (the nature of shortbread) and got a little too hard in the freezer, making it difficult to bite down into the sandwich. I made the second batch a little bigger and a little thicker, so it stayed softer, even when frozen with the ice cream.
I think putting stuff into a sandwich makes it even more delicious! Consider this a work-in-progress.
Tuesday, September 6, 2011
What's fer breakfast?
Ever since we got back from our family beach vacation in early August, I've been trying to stop eating everything in sight. Since, basically what we did during the week of family vacation was...ate everything in sight. Between the temptation of Tina's fantastic dinners and all the snacks I brought ("for the kids"), we packed a lot in. So...for the past 3 weeks I've been really, really good. No weekend morning pancake breakfasts have been happening. But, when presented with a delicious breakfast idea that was ALSO something new in the kitchen, I had to move on this!
Although I've made countless waffles in my life, I'd always heard of another type of waffle, the elusive "yeasted waffle." Most waffle batters use buttermilk to help with the fluffiness, but this recipe does not. The trick with yeasted waffles is that it's not a "spur of the moment" kind of breakfast. You gotta make the batter the night before so it can sit overnight and rise and bubble. Trust me, you are going to want to do this. When you wake up in the morning, you want to jump out of your skin and get right to eating! The smell of the yeast rising from the kitchen is INSANE!!
I searched all over the internet for yeasted waffles and almost all posts kept coming back to one recipe - Marion Cunningham's from The Breakfast Book.
A few really nice things about this recipe:
- It's easy
- It doesn't require any whipping or folding of egg whites (again, uses yeast for volume)
- It uses dry yeast, which is the kind that's most readily accessible (also called instant yeast or active dry yeast)
- You get to watch the yeast working, the bubbling is super duper cool.
- Did I mention how great it smells in the morning?
- Although you do have to think ahead, there is very little work to do in the morning!
On to the recipe:
½ cup warm water
1 package (or 2 ¼ tsp.) dry yeast
2 cups milk, warmed
1 stick (½ cup) unsalted butter, melted and cooled slightly
1 tsp. table salt
1 tsp. sugar
2 cups all-purpose flour
2 large eggs, lightly beaten
¼ tsp. baking soda
Put the warm water in a bowl (choose a large bowl, since the batter will double in size when it rises) and sprinkle the yeast over the top. After about 5 minutes, whisk smooth to be sure the yeast has dissolved. Now, add the milk, butter, salt, sugar and flour and mix until well blended. The batter will not be very thick, so this can be done with an electric mixer. If you are doing it by hand (which I did), use a whisk to be sure you break up the flour and end up with a smooth batter. Cover and set aside overnight at room temperature.
When you wake up, remember you are going to smell that yeasty goodness coming from the kitchen, get in der (no need to change out of your pjs, cause you're gonna want to laze around a bit after this) and add in your eggs and baking soda.
Get some coffee on now too, because it won't be long. Heat up the waffle iron and pour some batter in! The batter is very thin, so try not to over pour or you will have batter running down the sides of your waffle iron.
Give the first batch a few minutes in the waffle iron, I'd say at least 5, then gently lift up on the lid (like you would with any waffles) to check their doneness. They should be golden brown and they will be crispy. These waffles are easily THE BEST that Todd and I ever tasted. They are delightfully crisp and not too sweet, even slightly salty (which goes great with the maple syrup). Best eaten when fresh! Delish!
Up next, later this week: Macarons! (In keeping with the season, I'm going to try both plum and fig flavors. It will be an experiment!)