Tuesday, May 10, 2011

May Daring Bakers Challenge - Chocolate Marquis

After taking a month off to NOT create my own edible container with maple mousse, I'm back in the saddle again with the Daring Bakers. The May 2011 Daring Bakers’ challenge was hosted by Emma of CookCraftGrow and Jenny of Purple House Dirt. They chose to challenge everyone to make a Chocolate Marquise. The inspiration for this recipe comes from a dessert they prepared at a restaurant in Seattle.

This dessert REALLY appeals to me. It's creative, it's challenging, it's beautiful and it looks delish! Plus, because the meringue gets torched, it means I get to play with fire. Because the recipe makes SO MUCH, I was tempted to have people (might have to invite everyone I know) over to present it. But, because of the uncertainty of plating and finishing the dessert, as well as a newly discovered revelation regarding stress, I decided to halve the recipe instead and try it with a small (*intimate*) group. Since the marquis itself freezes well (it's in there now!), I can always decide to serve more once I've tried the presentation a time or two.

The dessert consists of several components. First, the marquis itself, which is a frozen custard that is thawed for serving. The marquis cube is coated in cocoa and placed upon a torched meringue and served with spiced nuts and a caramel. There are lots of different flavors and textures to enjoy!

Most components can be made ahead of time and stored (marquis and meringue in the freezer, caramel in the fridge), but I prefer to make the meringue at the time of serving. Since there are so many pieces to this, it's especially important to prepare your mis en place (get everything in place).


My first step was to make the chocolate base: Pour 6 oz hot (but not boiling) heavy cream over 6 oz bittersweet chocolate in a bowl. Whisk smooth after a minute or two. Add to that:
1/4 t salt
1/8 t cayenne
1/8 c tequila
1/8 c light corn syrup
1/2 t vanilla
1/8 c cocoa powder
1/16 t freshly ground black pepper
1 T unsalted butter, softened

Whisk smooth and set aside to cool somewhat.

Once the base is finished, begin whipping the eggs (6 large yolks + 2 large eggs) in a stand mixer for about 15 minutes until they lighten and become very fluffy.

Before


After


In the last few minutes of egg whipping, begin making a simple syrup by heating 1/3 c sugar with 40 ml water in a saucepan. Cook to softball stage (235 degrees) and then pour over whipping eggs, trying to place it in the crevice between the whisk and the edge of the bowl. Allow the meringue to continue whipping at high speed until cool (10 min or so). In a separate bowl, whip 1 c heavy cream to soft peaks.


When the meringue is cool, add in the chocolate base (give it a good whisk beforehand just to make sure it's smooth), being careful not to overly deflate the meringue. Fold in the whipped cream, then pour into a parchment-lined 8"x8" square pan. Wrap in plastic wrap (hit the surface of the custard) and put in the freezer to set for at least 4 hours.


Next, you can make your nuts and caramel. (Are you nuts?!?) To make the nuts, mix together 4 oz sugar, 1 t cinnamon, 1/4 t cayenne and 1/2 t salt. Whisk 1 large egg white in a separate bowl until frothy and thick. Add the spices to the egg white and whisk to combine completely. Add 1 cup blanched whole nuts (I used hazelnuts) to the mixture and toss with a spoon. Bake on a parchment-lined baking sheet at 350 for 30 minutes, until they turn golden brown. Set aside for serving.

To make the caramel, combine 4 oz sugar with 2 oz water in a heavy saucepan and cook over medium-high heat until a darkened caramel is formed. Temporarily remove the pot from the heat and carefully add in 4 oz heavy cream. (Be careful because this mixture will vigorously pop and bubble.) Once the cream's been added and the mixture settles down, return it to the heat (low is fine) and use a spoon to break up any hard pieces that have formed. When the caramel has darkened to the point you want it, remove it from the heat and add 1/2 t salt and 1 T tequila. Set aside until ready to serve.

When you are ready to serve, prepare the meringue (this makes approx. 2 cups) by combining 6 large egg whites, 7 oz sugar and a splash of apple cider vinegar in your mixing bowl. Stir over a double-boiler until the sugar has dissolved and the mixture is almost too hot for you to be able to put your finger in it. Move to the mixer and whisk the eggs to soft peaks. Add 1/4 t vanilla in the last few seconds of mixing.

When you are ready to serve, plate the meringue (pipe or scoop it onto the plate)and then torch it (or put under the broiler briefly) to give it some color. (Some others have suggested you can put any remaining meringue in a zip top plastic bag in the freezer until you are ready to use it again.)

Take the marquise out of the freezer and unmold it. Roll each of the 9 cubes in cocoa powder (about a cup), lay the cube on the meringue and let it soften in the refrigerator. Once it's softened, add the caramel and nuts and ENJOY!

Sunday, March 27, 2011

March Daring Bakers Challenge - Filled Meringue Coffee Cake

The March 2011 Daring Baker’s Challenge was hosted by Ria of Ria’s Collection and Jamie of Life’s a Feast. Ria and Jamie challenged The Daring Bakers to bake a yeasted Meringue Coffee Cake.

Yeast is a fabulous medium to work with. It's active, it smells good and it's scientific. Think of yeast in its envelope or jar as in a state of sleep. In order for it to work as a rising agent, it must be "woken up" or activated. This is done by adding sugar to feed it and/or a warm liquid to excite it. The best temperature for activating yeast is liquid around 100°F to 115°F. If the liquid is too cool, the yeast will not activate (the reason why yeast is sometimes stored in the freezer, it becomes dormant there), but too hot and the yeast will be killed! The best way to judge the temp of the liquid is to put your finger or hand in it and if you don't feel it or it feels only slightly warm, it's about right. Keep in mind that the normal body temperature is 98.6, so 100 degree water is right around there.

This recipes makes 2 round coffee cakes, each approximately 10 inches in diameter
The recipe can easily be halved to make one round coffee cake. I did decide to halve the recipe, since Todd and I just got back from eating and drinking our waistlines away in Mexico last week. The last thing I need right now is 2 large coffee cakes hanging around in my kitchen tempting me!

Ingredients:
4 c flour
1/4 c sugar
3/4 t salt
2 1/4 t active dried yeast
3/4 c whole milk (room temp)
1/4 c water
1/2 c unsalted butter at room temperature
2 large eggs at room temperature

For the meringue:
3 large egg whites at room temperature
1/4 t salt
1/2 t vanilla
1/2 c sugar

For the filling:
1 c chopped pecans or walnuts
2 T granulated sugar
1/4 t cinnamon
1 c chocolate chips or coarsely chopped chocolate

Directions:
To make the dough, combine 1.5 c of the flour with the sugar, salt and yeast in a large bowl (I used my Kitchen Aid mixer bowl.) In a saucepan, combine the milk, water and butter and heat over medium heat until warm and the butter is just melted.
With the mixer on low speed, gradually add the warm liquid to the flour/yeast mixture, beating until well blended. Increase mixer speed to medium and beat 2 minutes. Add the eggs and 1 cup flour and beat for 2 more minutes. Using a wooden spoon, stir in enough of the remaining flour to make a dough that holds together. Turn out onto a floured surface (use any of the 1.5 cups of flour remaining) and knead the dough for 8 to 10 minutes until the dough is soft, smooth, and elastic, keeping the work surface floured and adding extra flour as needed. This is my favorite part. Don't forget to make sure you get out any aggressions on the dough ball. It'll be better for it, and so will you!

Place the dough in a lightly greased bowl, turning to coat all sides. Cover the bowl with plastic wrap and a kitchen towel and let rise until double in size, 45 – 60 minutes.

While the dough is rising, make your filling by combining the cinnamon and sugar.

Once the dough has doubled, make the meringue, by beating the egg whites in a clean metal bowl with the salt. Beat until foamy, then add vanilla followed by the sugar, one tablespoon at a time, until stiff, glossy peaks form.


To assemble the coffee cakes, line 2 baking sheets with parchment paper. Punch down the dough and divide in half. On a lightly floured surface, working one piece of the dough at a time (keep the other half of the dough wrapped in plastic), roll out the dough into a 20 x 10-inch rectangle. Spread half of the meringue evenly over the rectangle up to about 1/2-inch from the edges. Sprinkle half of your filling evenly over the meringue. I had a helper with this part, that is when he wasn't reading the newspaper!


Now, roll up the dough starting from the long side. Pinch the seam to seal. Carefully transfer the filled log to one of the lined cookie sheets, seam side down. Bring the ends of the log around and seal the ends together, forming a ring, tucking one end into the other and pinching to seal. Using kitchen shears to make cuts along the outside edge at 1-inch intervals. Repeat with the remaining dough, meringue and fillings. Cover the 2 coffee cakes with plastic wrap and allow them to rise again for 45 to 60 minutes.

At this stage in the game (about 11 am), I left the house with Todd and Josh to go over to Todd's mom's house for what I thought would be lunch and then back home. I left the coffee cake proofing in the warming drawer of the oven. We didn't get home until after 3:00 and by then my coffee cake had over proofed, some of the outer portions of the dough were droopy, instead of tight and springy like they should be. This is what happens when you let yeast go wild for too long. I preheated the oven and baked it anyway. It looks great and will taste just fine I'm sure.


Preheat the oven to 350°F and brush the top of the cakes with beaten egg. Bake in the preheated oven for 25 to 30 minutes until risen and golden brown. The dough should sound hollow when tapped.

Remove from the oven and allow to cool on a rack. Just before serving, dust the tops of the coffee cakes with confectioner’s sugar as well as cocoa powder if using chocolate in the filling. These are best eaten fresh, the same day or the next day.

And, this is another one of those things that goes GREAT with a cup of coffee. Enjoy!

Friday, February 25, 2011

February Daring Bakers Challenge - Panna Cotta and Florentines

The February 2011 Daring Bakers’ challenge was hosted by Mallory from A Sofa in the Kitchen. She chose to challenge everyone to make Panna Cotta from a Giada De Laurentiis recipe and Nestle Florentine Cookies.

This was the perfect time for panna cotta. I don't know about you, but February was a blur for me, went by so quickly, without a whole lotta time to spend in the kitchen making desserts. So, I was happy to see this challenge. Panna Cotta is S.I.M.P.L.E. Not only that, it's really good. And, it's flexible, you can do whatever you want with it. And, last of all, it's jiggly!

Panna Cotta literally means "cooked cream." Which is what it is. Panna cotta is usually made up of a few ingredients: milk, cream, sugar and gelatin.

Ingredients
1 cup milk
1 tablespoon gelatin
3 cups cream
1/3 cup honey
1 tablespoon sugar
pinch of salt

Directions:

1. Pour the milk into a bowl and sprinkle gelatin evenly and thinly over the milk and let stand for 5 minutes to soften.
2. Pour the milk into a saucepan and heat over medium heat until hot, but not boiling, about five minutes.
3. Add cream, honey, sugar, and salt. Making sure the mixture doesn't boil, continue to heat and stir occasionally until the sugar and honey have dissolved 5-7 minutes.
4. Remove from heat, allow to cool slightly then pour into glass, ramekin or mold. 5. Refrigerate at least 6 hours or overnight.

VARIATION: Add a tablespoon or two of espresso powder to the warm mixture (I DID!)

After I made the mixture, I poured it into the ramekins and let them set over night. To finish the dessert, I made a small batch of coffee gelee, just a little coffee, some sugar, some gelatin and let it cool to room temp, then poured in the last 1/8 inch of the ramekin. Once set, run a knife along the edge, and turn upside down on a plate. You can garnish with some chopped hazelnuts. Enjoy!

Saturday, January 22, 2011

January Daring Baker's Challenge - Biscuit joconde and entremets

The January 2011 Daring Bakers’ challenge was hosted by Astheroshe of the blog accro. She chose to challenge everyone to make a Biscuit Joconde Imprime to wrap around an Entremets dessert.

A joconde imprime (French Baking term) is a decorative design baked into a light sponge cake which lends an elegant finish to desserts formed in molds. A joconde batter is used because it bakes into a moist, flexible cake. The cake batter may be tinted or marbleized for a further decorative effect. You can even use color!

The joconde batter is spread very thinly and then baked on high heat for a short time. It must be watched carefully so that it stays flexible enough to fit into the molds. If under baked, it will be sticky. If over baked, it will dry out and crack. Once cooled, the sponge may be cut into strips to line any shape ring mold.

Entremet is a French term used to describe an ornate dessert with many different layers in a mold, usually served cold. Usually the layers are mousses or bavarians, but other components (such as meringue for crunch or gelee to add texture) can be added. A glaze often tops it off.

What a challenge it was! I have to say that this is the most "daring" thing I've baked since going to pastry school... I'll make sure to tell you about all of my screw-ups, as well as lessons learned (at the end), so you can hopefully learn from my mistakes.

The first part challenge was figuring out what flavors to use. Since the joconde itself is made from almond flour/meal, I decided to choose flavors that would compliment almond. Not too hard, since nearly everything tastes great with almond. Eventually, I decided on a base of dacquoise (a crunchy baked almond meringue), alternating layers of chocolate and almond mousse, along with a raspberry gelee layer in the very center. I used a raspberry glaze for the top.

Since the dacquoise takes the longest to prepare (it has to bake for 2 hours), I decided to make that first.

1 T unsalted butter, softened
1/4 cup all-purpose flour
1 cup almond meal
1/2 cup sugar
3/4 cup powdered sugar
4 large egg whites

Heat oven to 200 degrees. Line a baking sheet with parchment paper. Brush with 1 tablespoon butter; coat with flour. Set aside. Whisk together the almond meal, 1/4 cup sugar, and the powdered sugar; set aside. Beat the egg whites until they form soft peaks. One tablespoon at a time, slowly add remaining 1/4 cup sugar and continue to beat to stiff peaks. Fold in the nut mixture. Spread the mixture onto the prepared baking sheet until it is 1/4 inch thick. Bake the dacquoise 2 hours then turn off the oven, and leave inside until completely cooled, about 30 minutes.

Once this was done, I decided to make my gelee, since it too takes some time to set. A gelee, especially one spread this thinly, is a fancy word for what is basically a grown-up fruit roll-up.

Raspberry Gelee
1 1/2 tsp gelatin powder
1 T cold water
1 cup frozen raspberry
3/4 oz superfine sugar

Sprinkle the gelatin over the cold water to bloom. Cook raspberries and sugar on the stove to dissolve the sugar, then blend in a blender. (You can strain to remove the seeds, but I like 'em in there.) Heat the gelatin until liquid (careful, this happens fast!), then mix into the raspberries. Pour the mixture into your cake pan set over a piece of plastic wrap, then allow to set for at least 2 hours.


Once this was in the fridge setting, I decided to mix up my joconde batter and decor paste.

Joconde

3oz almond flour/meal
2⅔ oz confectioners' sugar
1 oz cake flour
3 large eggs
3 large egg whites
⅓ oz sugar
1 oz unsalted butter, melted

In a clean mixing bowl, whip the egg whites and sugar to firm, glossy peeks. In a separate bowl, sift almond flour, confectioner’s sugar, cake flour. On medium speed, add the eggs a little at a time. Mix well after each addition. Mix until smooth and light. Fold in one third reserved whipped egg whites to almond mixture to lighten the batter. Fold in remaining whipped egg whites. Do not over mix. Fold in melted butter.


Cocoa Joconde-Décor Paste

7 oz unsalted butter, softened
7 oz confectioner's sugar
7 large egg whites
6 oz cake flour
2 oz cocoa powder

Cream butter and sugar until light and fluffy. Add egg whites, beating continuously. Sift together flour and cocoa powder, then fold the mixture into the butter/sugar/egg mixture.

For those of you who don't already know this about me, I never waste an egg white or a yolk. All those egg whites we just whipped up produced a bunch of egg yolks that can be used for something. And....guess what? Each batch of mousse filling requires 6 yolks. And, even if we weren't making mousse, we COULD make mousse or we could make ice cream. Or creme brulee. This list goes on. You probably have NO idea how easy any of these three things are to make.

To make the joconde imprime (the "patterned joconde"), create a pattern out of decor paste, on a flat baking sheet with silicone mat. You can spread a thin layer of the decor paste and then use a spatula, decorating comb or even your finger to make a pattern. Or you can use a piping bag full of the decor paste to pipe your own design on the mat. Keep in mind the height of your mold and how wide your patterned strips are going to need to be. I decided to use the piping bag and piped designs similar to those that are usually done in melted chocolate. Once your design is finished, put the whole baking sheet in the freezer for about 15-30 minutes to harden up.


At this point, I decided to revisit my dacquoise and cut it to fit my entremet. What I didn't realize is that a rectangular meringue (this one anyway) is way too crisp to be cut into any kind of even-close-to-circular shape. So, when I tried, it basically just shattered into various sides shards of sugary, eggy, nutty goodness. I ate a few of the scraps, then tossed the rest in the trash and tried to decide what to do next. Hmmmm...I think I will make ANOTHER dacquoise, this time in the springform pan, so that when I remove it, it will be the perfect size/shape for the bottom of the cake. So, I set my joconde batter aside, left my patterned decor paste in the freezer, hardening, and whipped up another batch of that dacquoise. While it was in the oven for 2 MORE HOURS, I decided to take a break and go for a long run. So that I didn't have to wait for it to finish cooking, I asked Todd (my husband) to turn the oven off when the timer went off. One of the nice things about this dacquoise is that there really isn't any need to adjust baking time. After 2 hours, it's done, and it just cools in the hot oven. So, when I came back from my run, the pretty circular dacquoise was finished and cool in the oven. I decided to leave it there (***) and go take a shower. Ahhhhhhhhhhhhh, all clean. Well, at this point, the joconde batter I'd made HOURS ago was deflating (remember all those whipped egg whites that were folded in, as well as the melted butter? There is only so long that can sit, even in the fridge), so I decided to make another batch. When it was done, I cranked up the oven to 475 to preheat for my joconde, pulled the patterns out of the freezer and then...


I STOPPED. WHAT IS THAT SMELL? WHERE IS THAT SMOKE COMING FROM?

IT'S COMING FROM THE OVEN, inside which the pretty, circular dacquoise is still sitting. Burned to a *&$&*(# crisp at this point!!! I had completely forgotten to take it out before preheating my oven!!! Now, a second 2+ hour dacquoise ruined. I decided the entremet was going to have to go without.

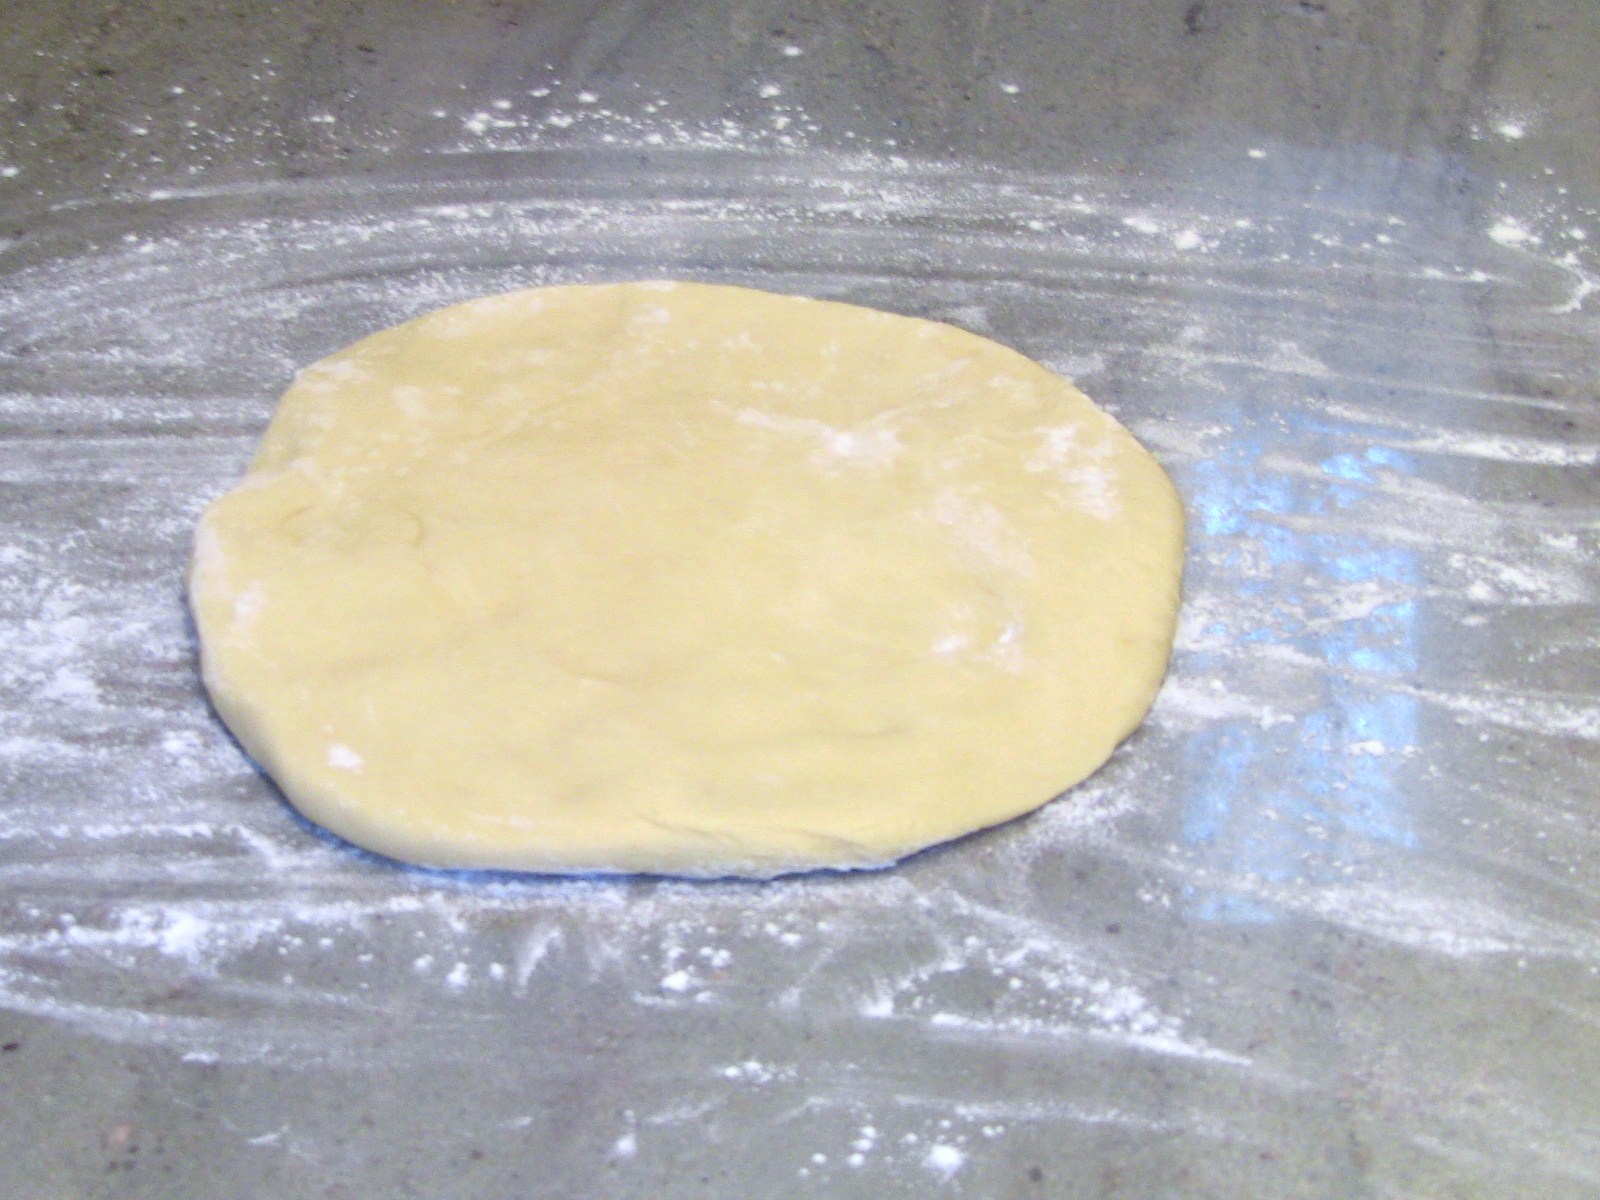
Once I'd aired out the kitchen, I pulled the baking sheet with my patterned decor paste out of the freezer (it was nice and hard by now!) and spread a layer of the joconde batter on top . (Since the pattern is frozen hard, it shouldn't move at all.) Try to keep the joconde batter at a consistent height across the baking sheet, 1/4" is good. Bake in that hot, hot, 475 degree oven for 7-15 minutes, depending on the thickness of your batter. (Mine was fairly thin, so it baked on the lower end of that range.) Remove, cool slightly on the pan, and then quickly flip onto a kitchen towel or parchment paper sprinkled generously with powdered sugar. (This keeps the back of the cake from sticking.)


Once it's cooled a little more, trim the edges with a sharp knife (and a straight edge/ruler) to fit the inside of your mold. Remember, I used the springform pan (the kind you normally use to bake cheesecake in), so once it was cleaned of the blackened dacquoise, I went to prepare the pan. Place a piece of parchment paper on a solid surface (cookie sheet, cutting board, cookbook, whatever) and top with a piece of plastic wrap. Put your ring mold or springform pan on the plastic wrap and then snugly bring the plastic up the sides so that the bottom of the pan is taut. I also used a rubber band around the bottom edge to keep the plastic in place. Cut a piece of either parchment paper or acetate strip to line the inside of your pan. You probably should measure and cut it to be a little higher than the top of the pan, but then trim to the edge of the pan once it's lining the inside. This will help you smooth the top of your entremet.

Now, press your cut cake strips into the inside of the mold, decorative side facing out. Push and press the ends together so that the cake lining the mold is seamless. You don't want any of that yummy mousse and stuff sneaking out! If you want to cut a circle of joconde to press inside the middle to be the "bottom" of your entremet, you can do that now. I did decide to to do that since I didn't have any other plans for the bottom once dacquoise #2 got trashed.

Now, time to fill that thing! Remember above, I said I was filling with alternating layers of chocolate and almond mousse, as well as that grown-up fruit roll-up ("raspberry gelee") in the center. I whipped those mousses up in a snap and got to work filling that pan.

Chocolate Mousse

Place 12 oz chopped semisweet chocolate in a double-boiler (or a metal bowl set over a pan of simmering water). Add 4 oz butter. Careful not to scorch, melt the mixture until smooth. In another metal bowl, whip 6 egg yolks, add 3 oz sugar, an ounce or two of liquor if you want, and whisk over that pan of simmering water until it's almost too hot for you to stand it when you put your finger in. Move the metal bowl to a mixer and whisk on high until cool. (Since this takes a while, you might want to do that in your mixer bowl so you can just set it and forget it. For a few minutes.) When it's cool, it should be nice and thick. In a separate bowl, whip 1 pint (= 2 cups) of heavy cream to soft peaks. Fold the chocolate/butter mixture into the egg mixture, then gently fold in cream until no streaks remain. DO NOT OVERMIX or you will deflate. Refrigerate to set.

Almond Mousse

Now, I had never made almond mousse before, nor did I have a recipe. But, I did buy a really nice, gourmet, imported almond paste from Southern Season just for this occasion, so I had to ad lib. NOTE: It did not go as planned...Prepare the egg, sugar and liquor (if you want) mixture as above. For those of you taking notes, this is called a "sabayon" in French pastry terms. I tried softening the almond paste some by heating it in the microwave and then used a fork to try to soften it some more. When folding ingredients into each other for a mousse such as this, you really want the two components to be of similar consistency. This allows them to blend nicely. These two things did not blend nicely. The almond paste never got "smooth" and there were little chunks throughout the mixture. Plus, it was so much stiffer than the sabayon that I deflated a lot of it when mixing them. Once mixed, I folded in a pint of whipped cream (soft peaks) and refrigerated. Even though it had little almond paste chunks in it, it still tasted good!

To assemble, I spread a thin layer of chocolate mousse (about 1/2"), then almond mousse, then flipped the set gelee on top, then another layer each of chocolate then almond mousse.


You want the fillings to be higher than the top of the joconde. That way, when it's unmolded, your audience gets to see some of the mousse over the top. The whole thing goes in the fridge now for a few hours to set the mousse and chill.... When you are ready to glaze the top, heat some raspberry jam on the stove with a little apricot jelly, strain, cool slightly, then pour on top of the cold mousse and refrigerate to set.


You can decorate the top with fruit, chocolate shavings, nuts, or some kind of design or combination of these things.

I promised I'd share my lessons learned...

1.When cooling something in the oven, always remove from the oven once cool!
2.Dacquoise/meringue do not cut into circles!
3.Almond mousse is not easily made with almond paste. There's gotta be a better way, perhaps using almond extract to flavor. If you find one, let me know.
4.Plan ahead when layering your mousse. Make sure you know how much you have so that you have enough to make the layers you plan to make and have them all be the same thickness. If in doubt, make a double batch.


All in all, this was indeed a daring challenge. I brought the entremet to work and everyone loved it! (They didn't even have to know about the screw-ups.)

Monday, December 20, 2010

December Daring Baker's Challenge - Christmas Stollen

The 2010 December Daring Bakers’ challenge was hosted by Penny of Sweet Sadie’s Baking. She chose to challenge Daring Bakers’ to make Stollen. She adapted a friend’s family recipe and combined it with information from friends, techniques from Peter Reinhart’s book.........and Martha Stewart’s demonstration.

Before I get started, I'd like to talk a little bit about yeast. Since the heart of this challenge is the yeast, it might be nice for you non-bakers out there to understand it a little better. So, what do you know about yeast? Maybe you know it is a fungus. Did you know it is alive? Yeasts are single-celled organisms, the ones used in baking (and beer making) are called saccharomyces cerevisiae. Evidence of using yeasts for baking has been found dating back to ancient Egyptian days, but they weren't discovered to be living yeasts until 1857 when Louis Pasteur wrote a paper describing their actions. When you see yeast bubbling, it means that the yeast is emitting carbon dioxide. When yeasts feed (on sugar primarily), they give off C02, which is what makes the bubbles and also what makes breads rise. Yeasts get more active when they get warm, even more active when they get warmer and then eventually die when they get too hot (which is when the bread stops growing and keeps baking). Yeasts will slow down when cold, so that is why you sometimes see yeast stored in the refrigerator or freezer. Many yeasts breads can be kept in the refrigerator to rise slowly, thus developing even more flavor. Before yeast breads are baked, they go through a process called "proofing," which basically means that you have a period of time where you want the yeast to show you "proof" that it works, that is is alive and active. So, after rising, you punch the dough down to release the built up CO2, then set it somewhere warm to "proof" right before you bake. When proofing, you usually want to see the bread rise or grow in size. Proofing is best done at warm room temperature.


Before actually starting the stollen, I'm going to need to make the candied citrus peel. I have 5 beautiful oranges here at the house, so I'm going to make candied orange peel. I used a recipe by David Lebowitz to make the candied peel, first blanching the peel, then boiling it in a sugar syrup to just below the soft-ball stage.


Stollen Wreath
Makes one large wreath. Serves 10-12 people
Ingredients
¼ cup water (110º F)
1/2 oz active dry yeast
1 cup milk
5 oz unsalted butter
5½ cups flour
½ cup sugar
¾ teaspoon salt
1 teaspoon cinnamon
3 large eggs, lightly beaten
Grated zest of 1 lemon and 1 orange
2 teaspoons vanilla extract
1 teaspoon lemon extract or orange extract
¾ cup candied citrus peel
1 cup firmly packed raisins
3 tablespoons rum
1/4 cup dried cherries
1/2 cup dried cranberries
1 cup almond pieces
Melted unsalted butter for coating the wreath
Confectioners’ sugar for dusting wreath

Before you start, soak the raisins in a small bowl with the rum and set aside.
To make the dough, pour 1/4 cup warm water into a small bowl (water at 110 will be warm to the touch, but not scalding), sprinkle with the yeast and allow to stand for about 5 minutes. This softens the yeast enough to allow you to stir to dissolve. You should soon see that the yeast begins to bubble.


In a small saucepan, combine milk and butter over medium heat until the butter is melted. Let stand a few minutes to cool. In the meantime, lightly beat eggs in a small bowl and add citrus (I used lemon) and vanilla extracts.

In the large bowl of your stand mixer, stir together the flour, sugar, salt, cinnamon, orange and lemon zests. Then, on low, mix in (using the paddle attachment) the yeast/water mixture, eggs and the lukewarm milk/butter mixture. This should take about 2 minutes. It should be a soft, but not sticky ball. When the dough comes together, cover the bowl with a kitchen towel and let rest for 10 minutes. Add in the candied citrus peel, dried fruits and almonds and mix with your hands or on low speed to incorporate. On a lightly floured counter (or in the mixing bowl using a dough hook), knead the dough to distribute the fruit evenly.


This should take about 6-8 minutes. (A good way to tell when the dough is well blended is that some of the raisins on the outside will start to fall off the top of the dough because it is no longer sticky enough to hold them on.) Lightly oil a large bowl and transfer the dough to the bowl, rolling around to coat it with the oil. Cover the bowl with plastic wrap and put it in the refrigerator overnight (or up to a week) to rise slowly and develop flavor.

Be sure you allow yourself about 5 consecutive hours for the final portion. Once you are ready to bake, remove the dough from the refrigerator and allow it to rest at room temperature for 2 hours to warm slightly. Punch the dough down, dump it out of the bowl and onto the counter. Roll into a rectangle, approximately 16 x 24 inches. (It should be about 1/4" thick.)

Starting on one long side, begin rolling the dough into a 24" tightly rolled log.

Transfer the log to a parchment or silpat-lined sheet pan and join the ends together to make a circle. Use your fingers to pinch the ends together to join them well. Going around the circle, cut slashes about 2/3 way through approximately every 2 inches around the circle to resemble a wreath.

Set the wreath aside to "proof" for about 2 hours at warm room temperature. After this time, it should have expanded to about 1 1/2 times the original size. Bake in a 350 degree oven for 20 minutes, rotate the pan, then bake for another 20-30 minutes. When done, the top should be dark golden brown and the internal temperature register 190 degrees. Transfer to cooling rack and brush with melted butter while still warm. Sprinkle generously with powdered sugar. (This butter/sugar process can be repeated multiple times. Each coat protects the stollen and prolongs the freshness.)


This stollen travels easily, keeps well and is FANTASTIC toasted with a smear of butter. Even better still alongside a cup o' joe. We have been eating off of it for days and no one could resist. This may become a new holiday tradition in the Durham home!!

Wednesday, November 24, 2010

November Daring Baker's Challenge - Crostata!

In an attempt to make sure I don't get into a baking "rut" (If you call it a rut if I tend to always make chocolate or fruity layer cakes), I decided to rejoin the Daring Baker's group so that at least once a month I'd have a new baking challenge, proposed by someone other than myself. Getting back on this blog again will also hopefully help me to blog about some of my other desserts that I'm making. Just as a reminder, the purpose of this blog is for me to post pictures of some of the desserts I am making, as well as recipes and little scientific or baking-related "tidbits" that people will find interesting and explanatory.

The 2010 November Daring Bakers’ challenge was hosted by Simona of briciole. She chose to challenge Daring Bakers’ to make pasta frolla for a crostata. She used her own experience as a source, as well as information from Pellegrino Artusi’s Science in the Kitchen and the Art of Eating Well.

What is a Crostata? A crostata is an Italian baked dessert, like a "tart" or a pie. Typically, it's roughly shaped and the edges are folded over to give it a more rustic appearance. Typically they are filled with fruit jams or a combination of fresh fruit and pastry cream. If it were summer time, I would definitely have opted for a fresh fruit and pastry cream crostata, but because so many of the fall fruits are fantastic when roasted, I opted instead to make an autumn crostata of Apple, Pear and Quince.

Just to give some background on the quince, quince is a pome fruit related to apples and pears, native to Asia. Even when it is ripe, a quince is usually too hard and too sour to be eaten raw. A couple additional interesting tidbits about quince:

-Although the book of Genesis does not name the specific type of the fruit that Adam and Eve ate from the tree in the garden of Eden, some historians and ancient texts suggest that Eve's fruit of temptation might have been a quince

- Among ancient Greeks, the quice was a ritual offering at weddings

- Like apples, the seeds of the quince, if eaten in sufficiently large quantity can be broken down in the body to produce cyanide.

OK, now that you know that stuff, can we move on to the recipe? Sure. So, here we go.

For the base layer of the crostata, we were given several recipes from which to choose for "pasta frolla," which is a shortbread dough, like a pie dough, but uses eggs instead of cold water to bind the dough. As you can imagine, it is rich and delicious and, no matter how good that filling is, the *best* part of a crostata for many people. This is Simona's pasta frolla recipe, which is what I used. (Since I made an 11" tart, I used 1.5 times the recipe.)

Pasta Frolla
3 oz powdered sugar
8.25 oz AP flour
pinch salt
4 oz cold butter
zest from 1/2 lemon
1 egg + 1 egg yolk

To make, blend the sugar, flour and salt together in a mixing bowl, then cut the butter into small pieces and rub it into the dry ingredients until it has a coarse crumb. There can be a few larger, pea-sized pieces mixed throughout.


Make a well in the center and put in the lightly-beaten egg mixture (reserve a tablespoon or so to use for glazing the crust later).

Using a fork, pull the dry ingredients into the liquid and mix together until blended.


Shape into a ball and then flatten into a disk, wrap in plastic wrap and refrigerate until cold.


While the dough is chilling, roast the fruit.

3 ripe, but firm pears
3 firm apples (I used Fuji)
1 quince
1 stick of cinnamon
4 whole cloves
1/2 cup sugar
3 T lemon juice
2 T apple cider
1 T minced fresh ginger

Peel, core, quarter and then cut the fruits into about 1" sized pieces. Mix together with remaining ingredients and roast in a 375 degree oven for about an hour, mixing occasionally, until starting to caramelize. Remove from oven and cool.


Remove the crust, and roll out on a lightly-floured surface until it is a few inches larger in diameter than your pan. Lightly place in the pan and cut excess. You can decide whether you want the crust to roll over the top loosely, or whether you want to fit it to the edge of the tart pan. Put the crust in the pan back in the fridge to stay cool while you make the additional filling.

4 oz softened butter
1/2 c powdered sugar
1/2 c packed brown sugar
2 large eggs
1 t vanilla
1/4 c flour

Blend butter with sugars until light and fluffy. Add eggs, one at a time, then vanilla. Blend flour in last, only mixing until blended.

Remove crust from the fridge, pour in the filling, then top with the roasted fruit (including juices). If you have saved crust to fold over, go ahead and fold it over now. Brush the edges with the reserved egg, sprinkle with sugar and bake at 375 degrees on a preheated cookie sheet for 50-60 minutes until the filling has puffed up around the fruit and the edges of the crust are browned.


In case you weren't already thinking of it, this is EXCELLENT with a scoop of vanilla ice cream on the side. Buon Apetito!

Wednesday, October 29, 2008

October Daring Bakers Challenge - Pizzaiola!

October's challenge, brought to us by Rosa from Switzerland, is to make "real" pizza dough. The recipe is adapted from The Bread Baker's Apprentice, by Peter Reinhart. The original recipe makes 6 pizza crusts. I halved the recipe and made three, baking one right away and freezing the other two for another time. Each one of my pizzas measured to about 12-14" and was more than enough to feed 2 people for dinner, especially with a small salad on the side. I have made my own pizza dough before and I would say that, in comparison to other recipes, this one was not bad. I found it a little bland. With the right toppings, it can still be very tasty!


BASIC PIZZA DOUGH

4 1/2 Cups bread flour or all purpose flour, chilled
1 3/4 Tsp Salt
1 Tsp Instant yeast
1/4 Cup Olive oil or vegetable oil (both optional, but it’s better with)
1 3/4 Cups water, ice cold (40° F/4.5° C)
1 Tb sugar
cornmeal for dusting

To get started, get yourself a nice, flat place to work. I have tiled countertops, so I use a board from Chef's Catalog. Then, mix the flour, salt and yeast together in the mixer bowl. Add the oil, sugar, and cold water and mix (using a large spoon or your dough hook) well to form a sticky ball of dough. Move this to a well-floured board and knead (THIS IS THE FUN PART!) using your hands (also well-floured) for about 5-7 minutes. It took me 10 minutes. Once you are done, your dough should be elastic and smooth.

Cut the dough into equal portions using a bench scraper and, using floured hands, roll each portion into a smooth ball. Place each ball into an oiled bag (I use a plastic grocery bag) and store in the freezer (for future use) or, overnight in the refrigerator. Seal the bag by pressing the air out of it and tying a knot towards the top of the bag. You want to make sure to leave room in the bag for the dough to grow and release carbon dioxide during fermentation. If you freeze the dough, you can probably keep it there for a month or so, and make sure you move it to the fridge overnight the day before you want to use it.

The following day, about 2 hours before you plan to use your dough, remove it from the fridge and peel it out from the bag onto your lightly oiled and floured work surface. Using plenty of flour for your hands, the surface and the dough, press the dough into a round disk about 1/2" thick. Cover it with a towel or some plastic wrap and allow it to rest for about 2 hours.

About 45 minutes before you bake the pizza (1 hour 15 minutes after you set it to rest - are you paying attention to all of these timelines?), preheat your pizza stone by setting the oven to the highest temperature possible (500). Pizzas cook best with INTENSE heat underneath them. This is why stones or brick ovens (sometimes get up to 700 degrees!) are used. If you do not have a stone, you can use the back of your baking sheet, but it won't get as hot.

After 2 hours rest, sprinkle the back side of a large baking sheet or jelly roll pan with durum/semolina flour or cornmeal and move the dough to your floured hands, keeping your fists rounded. Begin by stretching the dough in a circular motion with your hands. When you are comfortable, progress to a full TOSS! While you are doing this, if the dough sticks to your hands - FLOUR them! If the dough does not want to stretch or expand, it just needs a little more time to rest. Set it down for another 20 minutes and try again.

Once your pizza crust is the size you want it, place it on the back of your baking sheet, making sure there is enough flour or cornmeal to keep it from sticking. (You are going to want to be able to slide it off onto your pizza stone.)

Top your pizza with the toppings of your choice and place the pan in the oven, or slide it off on to your preheated pizza stone. Bake at 500 for about 5-8 minutes and then begin checking. You want the crust to be cooked from the underside, but the cheese and toppings on top to be melted and hot.

When it's done, take it out of the oven and let it cool for 5 minutes before cutting. ENJOY!